
Exporting Data In CSV File
In this article, we'll be showing you how to export your data as a CSV file as well as control the data that is included in the export.
Written by Team HanoverLast update 4 years ago
In this article, we'll be showing you how to export your data as a CSV file as well as control the data that is included in the export.
Export As CSV 💾
In this example, we'll so you how to export participants application data. You can follow the same steps to export Host data too.
When logged in as an admin user;
- From the menu, click 'Participants' and then 'All Participants'
- Use the filters to get the data set that you'd like to export
- Select which Participants you want to export using the tick boxes next to their name
- TIP: you can select all by using the select box at the top of the column.
- Click on the 'Export' dropdown
- Click 'CSV'
- You will receive a confirmation message saying
CSV will appear in your downloads
To navigate to your downloads inside Hanover;
- From the menu, click 'Admin' and then 'Downloads'
- Click the 'Download' button next to the relevant export
- *Please note that for large datasets it may take up to 1-hour to appear in downloads.
Controlling What Data Is Included In A CSV Export 📩
Every field that you create inside your application forms can be included in a CSV export. In order to select this, when logged in as an Admin user;
- From the menu, click 'Participants' and then 'All Participants'
- Use the filters to get the data set that you'd like to export
- Click the '+' on the data table
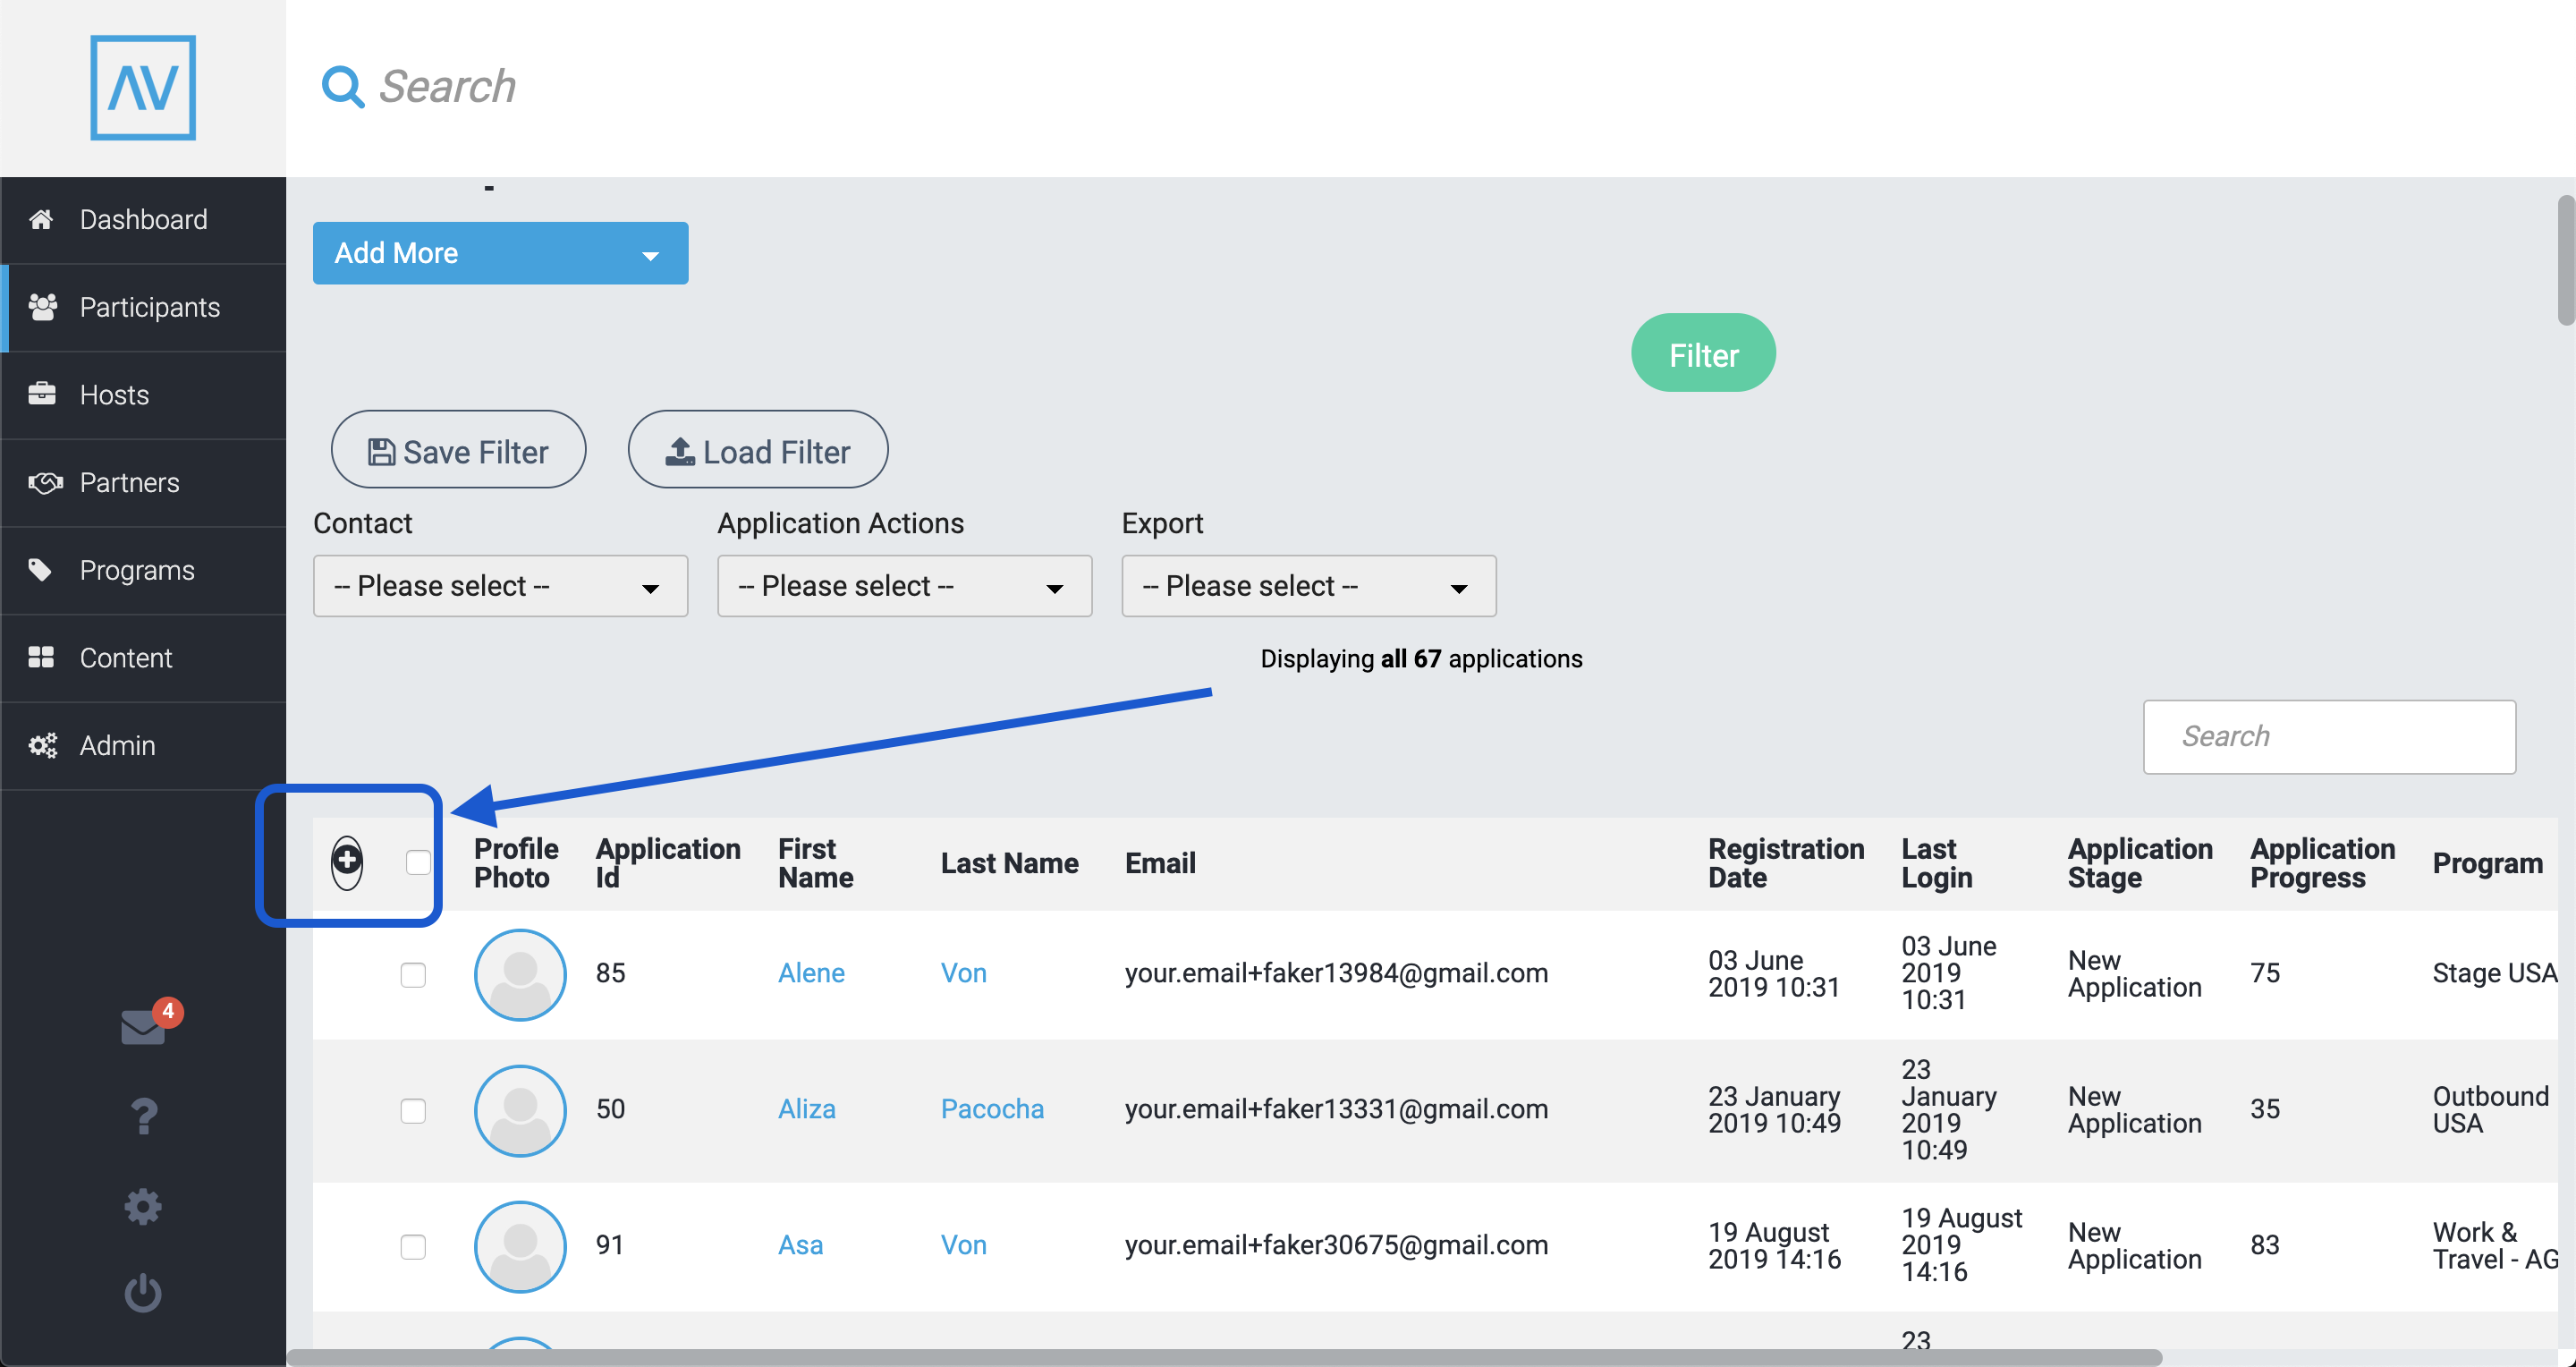
- Use the tick boxes to select which fields you would like to be shown in the data table
- TIP: you can drag and drop to reorder the columns
- Click 'Save'
- The data table will now show the selected columns and data
- Follow the steps above to export this data to a CSV
- TIP: save this view as a 'filter' so that you can get the data table back in the same format in the future quickly
Did this answer your question?